Arts & Crafts

Kumihimo Unity Project

Nearly four years ago I published a post featuring a kumihimo project that I designed following the riots in Ferguson, Missouri. Follow-up: my son has graduated with a degree in criminal justice and will be attending graduate school this fall. I’m quite proud of him, but the recent events in Minneapolis and across the United States have reignited my anxiety about his safety when he enters the workforce. I do not understand the actions of the police officers or the ensuing rioters, nor will I likely ever comprehend either. What does seem clear to me is that every one of us needs to examine our personal views and behaviors for biases and do our very best to eliminate them.
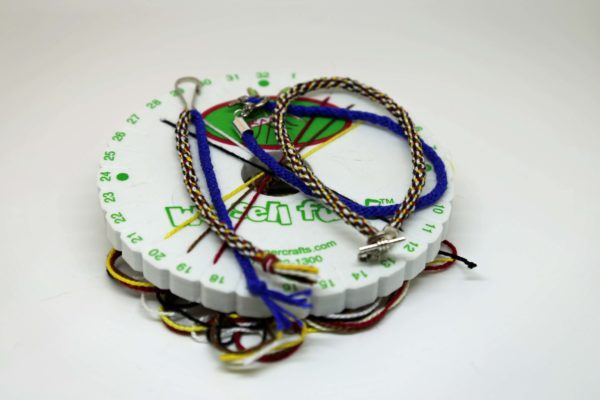
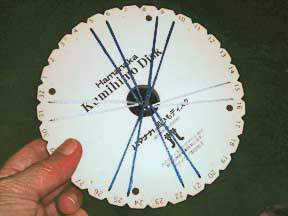
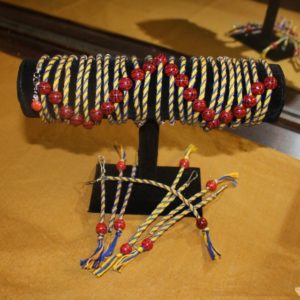
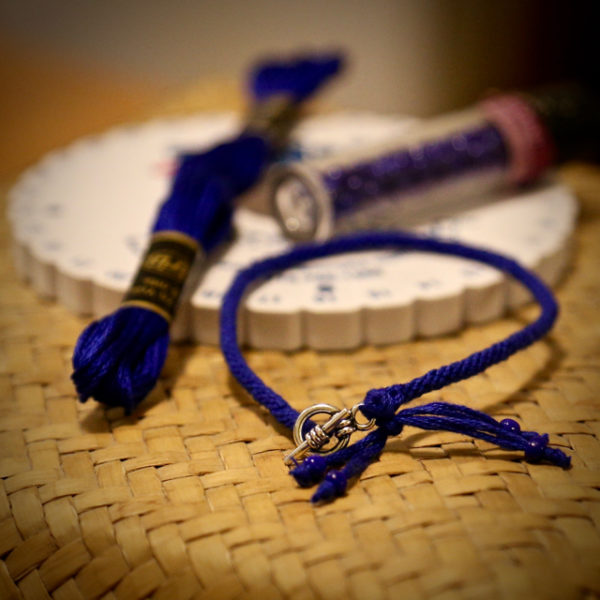
This inspired me to pull out my trusty kumihimo disk to design a companion piece to the Thin Blue Line bracelet—I call it a Unity bracelet. I chose craft thread in the colors featured in the children’s song Jesus Loves the Little Children: “Red, brown, yellow, black and white; They are precious in His sight.” I placed the string on the disk in that order (see photo). Because there were five colors, I arranged them in groups of three and two strands. While I haven’t encountered another kumihimo pattern laid out quite like this, it worked out fine. Otherwise, the project parallels the instructions for the Thin Blue Line bracelet.

Kumihimo means “coming together of threads,” which strikes me as an apt metaphor for working toward preventing future events such as those in Ferguson and Minneapolis. In my impatience to get this project underway, I did not bobbin the strings, and at first they snarled with almost every move, requiring patience for the frequent stops necessary to untangle the threads before moving forward. As the “coming together” progressed, however, tangling became less common and braiding became easier. The final pattern turned out to be an attractive tweedy design that showcases each individual color equally.

With plenty of craft thread left over after the bracelet was finished, I decided to create a matching key fob. The simplicity of this project is very appealing—it uses only string and a lanyard clip and requires much shorter braids. I created the Unity pattern first, then rethreaded the lanyard clip to add the Thin Blue Line part. The ends are finished in overhand knots—easy peasy and quick.

I now wear a Unity bracelet in tandem with a Thin Blue Line bracelet, have a fob on each of my key rings, and plan to make a few more to secure (and identify) camera bags and luggage. Ideally they will serve as visual reminders to love all of God’s children and pray for equality, justice, and unity.
“Thin Blue Line” Kumihimo Bracelet

thinblueline


In less than a month, my son will leave for college to pursue a degree in criminal justice. I am both immensely proud of him and terrified. So when a friend of mine created a simple bracelet of paracord and sliding knots in support of our police forces, I was inspired to pull out my long-neglected craft stash and design a copycat kumihimo bracelet. My objective was to design a pattern for a thin bracelet that is easy to modify according to skill level and available materials. The bracelet shown took three to four hours to complete, including gathering supplies.

Materials:

  • 1 skein of blue embroidery floss or craft thread, or 8 yards of yarn, ribbon, raffia or similar material
  • kumihimo disk (foam or cardboard, manufactured or DIY)
  • needle threader or floss threader
  • fastener (optional)
  • four 6/0 beads (optional)
  • lead weight (optional)

Directions:

  1. Cut embroidery floss into four equal lengths or measure and cut four two-yard lengths.
  2. Thread each strand through one side of a fastener (the bracelet pictured above features a toggle clasp). Alternative: tie an overhand knot at the center of the strands, creating a small loop.
  3. Push the fastener or loop through the hole in the kumihimo disk and set up for an 8-strand braid (directions here if needed).
  4. Braid to desired length, using an optional weight to keep the braid taut. The bracelet pictured is about 7.5″ long.
  5. Finish by threading half of the ends through the remaining side of the fastener and tying into a square knot. Groups of two strands of floss may be threaded through a bead (as shown), then knotted and cut off. Alternative: braid ends into two strands and knot them through the loop on the other side, or make an overhead knot big enough to fasten through the loop, or tie on a button.

May God bless those who serve and protect.

Use What Ya Got

“Reduce, Reuse, Recycle” is one of my favorite slogans. Of the three, “reuse” is probably the most difficult to incorporate, because getting something new is generally more enjoyable and many times just a whole lot easier. I have always found fun in scrounging up items for a Halloween costume or a play costume, but I am challenging myself to reuse and repurpose as often as possible in day-to-day life. I found a couple of opportunities to do so this past week.

dark-purple-divider-md

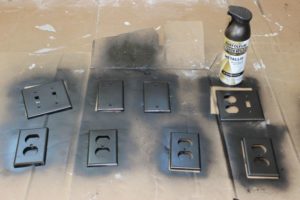
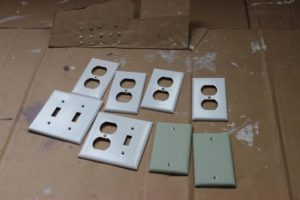
I have been repainting our front room in shades of taupe and plum, and decided that it would look nice to replace the outlet covers and switch plates with oil rubbed bronze. I priced new ones at a local hardware store and found that it would cost $60 to replace four outlet covers, two switch plates and two blank wall plates. Sixty dollars! Sorry, not in the budget. Fortunately I still had some ORB spray paint left over from an earlier bathroom project, so I cleaned up the old covers:

outletsbeforeand gave them (and all of the screws) a couple of quick coats.

outletsafter

Presto! Designer plates at no cost. At some point I will likely pick up a couple of new blank plates, because these had been painted to match the previous wall color and the surface did not turn out as smooth as I would like. (While I had the ORB paint out, I gave the bathroom heating vent a quick touch-up as it had a small chip.)

dark-purple-divider-md

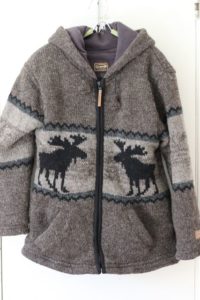
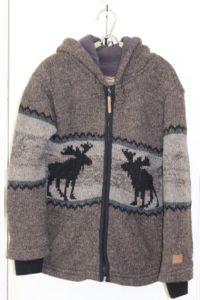
The second project involved this wool jacket I bought during our trip to Alaska last year.

jacketbefore

I had admired the jacket at a couple of shops in Talkeetna. It was warm and it was beautiful; it was also out of my price range. Back at our lodge, the same jacket – in my size – was on the clearance rack, marked down about 60% due to a defect. Upon close inspection I noticed that a single tooth was missing from the zipper, but it still worked perfectly. Score!

What I did not notice until I got home was that the sleeves were slightly shorter than I prefer. With gloves on, if I bent my arms there was a little bit of wrist exposed. I hate that. For a year the jacket hung in the coat closet. A couple of weeks ago Phil asked me when I was going to wear it, so I decided it was time to fix the sleeves. Problem was I had no idea how. My first idea was to knit a pair of cuffs, but I had no yarn that would match, nor did the local yarn stores. My second idea was to harvest the cuffs of an old sweatshirt, but I did not have anything in the right color and I did not think the textures would look right. But that idea led me to remember a wool sweater of Phil’s that had recently been subjected to an unfortunate accident.

  • Bad thing about wool sweaters – they shrink when they are run through the dryer.
  • Funny thing about wool sweaters – they don’t shrink proportionally width- and length-wise, so a shrunken sweater won’t fit anyone.
  • Great thing about wool sweaters – they have cuffs!

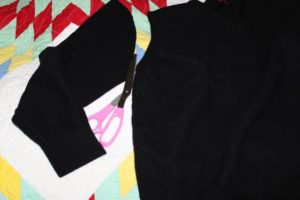
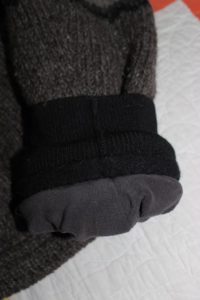
I had been thinking about brown cuffs to match the overall color of the jacket. Phil’s sweater was black, but the cuffs had shrunk just enough to fit snugly around my wrists so I decided to use them. The first – and hardest – step was to cut the sleeves off of the sweater. Silly, since the sweater was not going to do anyone any good.

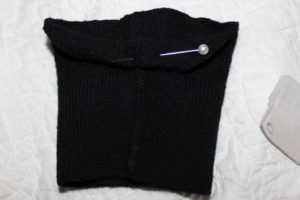
jacket2Next, I measured 1.5″ up from the edge of the cuff, folded it over twice and loosely hemmed around the top folded edge. I might have been able to skip this step since the wool turned into felt in the dryer, but I prefer the neater look of a hem.

jacket4

I stretched the hemmed top edge of the cuff around the bottom edge of the jacket sleeve, aligning the side seams, and sewed the cuff into place along the hemline already in the jacket sleeve.jacket6Here’s the result. No more drafty cuffs!

jacketafterSince the jacket and cuffs are both wool and the color of the cuffs matches the moose motif, it looks like the jacket could have come this way. Best of all, my wrists stay warm!

dark-purple-divider-md

In no way should this post be interpreted as permission to use plastic grocery bags as a substitute for suitcases. That is just tacky, my friends. Repurpose the grocery bags to line the bathroom trash can. Better yet – stop collecting plastic bags and use reusable ones. I promise to overlook it if you use one of them as a suitcase.

Kumihimo

A few years ago, Laura got hooked on braiding friendship bracelets. She quickly learned to follow intricate patterns that left me completely lost. One day as I searched for new patterns online, I came across an interesting variation called kumihimo.

Originating in Japan during the eighth century, kumihimo (“gathering of threads”) developed into an extremely beautiful and useful art form. Its original purpose was to lace together plates of samurai armor and embellish swords. Some warriors could be identified by the unique intricate patterns of their kumihimo cords. Kumihimo braids were later used to fasten the obi (wide sash) around a kimono (traditional formal Japanese dress). Today kumihimo is used for many purposes, including beautiful jewelry.

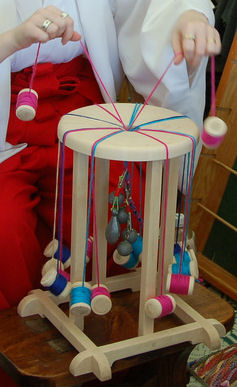
marudai

Historically braided from pairs of silk threads on wooden looms known as marudai, some patterns have been adapted for braiding on foam disks with slits to hold the threads.

disc

I found the repetition of the kumihimo patterns to be very calming. I especially liked a pattern known as ridged spiral, and decided to utilize it in gifts for Laura’s basketball team a couple of years ago.

bb-bracelets

My pattern was featured in the What a Knit May 2012 newsletter. Space constraints caused the pattern to be significantly condensed, so I am publishing the full version here for those interested.

KUMIHIMO TEAM BRACELETS

Designed by Sara Hartman

 Materials for approximately ten bracelets and one key fob:

  • two skeins of embroidery floss or craft thread in main (ridge) color
  • four skeins of embroidery floss or craft thread in background color
  • lanyard end or key ring
  • 4mm end caps, two per bracelet
  • split rings or jump rings, two per bracelet
  • lobster claw clasps, one per bracelet
  • beads or charms, one per bracelet (I used Bead Magic basketball beads)
  • kumihimo disk (my favorite is the Bead Smith mini kumihimo disk)
  • 12 bobbins (I used small EZ Bobs)
  • glue (I used E-6000)
  • floss threader (I used the kind the orthodontist gave to my kids)
  • weight (I used a 1-ounce fishing weight)

Unwind and find the midpoint of each skein of embroidery floss. The main color will start in slots 32 & 16 and 1 & 17. The background color will start in slots 6 and 22, 7 and 23, 10 and 26, 11 and 27. Center the floss on a foam kumihimo disk and wind the ends onto fold-over bobbins. Once all six skeins of floss are prepared, put a lanyard end around the intersected strands of floss, and hang a weight on it.

Braid in the ridged spiral pattern until the main color runs out. (Note: This pattern may be found on page 21 of Makiko Tada’s Comprehensive Treatise of Braids VI: Kumihimo Disk and Plate. There are online instructions at http://www.weirdollsandcrafts.com/none/round3.html. If you prefer a visual tutorial, see http://www.youtube.com/watch?v=zGZL7qpkdNI (it’s in Spanish but has English subtitles and is easy to follow). Remove the braid from the disk and gently stretch it. I found that each complete rotation around the disk makes 1” of braid, and six skeins of standard embroidery floss yields 60 – 66” of braid.

Use a floss threader to string about 12 beads onto the braid. (I usually pull 2-4 strands of floss through the beads at a time.) Extra beads are easily removed at the end of the process, but near impossible to add after the first bracelet is cut.

Cut segments to 6.25” (for a 7” bracelet) making sure there is a bead on each segment before you cut it. (Adjust the segment length for longer or shorter bracelets.) Glue on the end caps. When the glue has dried, add split rings and lobster claw clasps to attach them.

Leave a bead on the leftover braid with the lanyard end to make a key fob for the coach. Tie an overhand knot at the desired length and unravel a bit of braid for a short tassel.

Repeat as necessary for the number of bracelets and key fobs needed for your team. My daughter gave these to her teammates and coaches at Christmas and they loved them!

Do You Like My Hat?

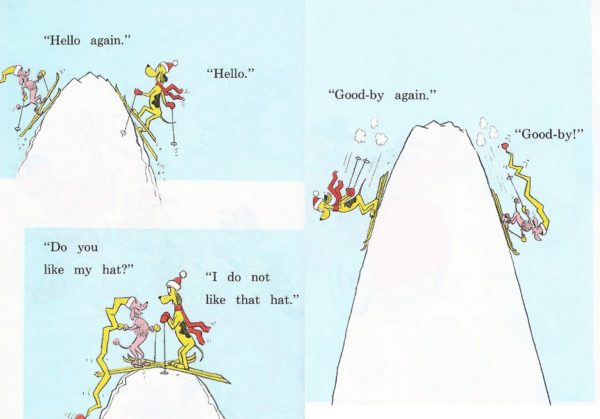
Go Do, Go! is one of my all-time favorite children’s books. What’s not to love? Big dogs, little dogs, black and white dogs, dogs at work and dogs at play, driving dogs, sleeping dogs, and big dog parties. Plus a little pink poodle who rocks her hat collection and keeps hoping that a certain beagle will notice.

youlike

Maybe that early influence has something to do with my penchant for knitting, or rather looming, hats. Looming is a similar concept to knitting in the round, but a lot faster and much less complicated. I got hooked (literally!) on it several years ago. Quick, impressive results – what’s not to love?

You don’t need much to start:

  • First, a loom. There are long looms and round looms. The long ones are more versatile for flat panels, afghans, socks and the like, and there are little clips to adjust their size. I think the round ones are easier for hats. Knifty Knitter and Boye are brand names, but most craft stores carry generic loom sets in various sizes from baby through adult. You shouldn’t need to pay retail – buy them on sale or use a coupon.
  • Second, a loom hook or pick. These come with the looms, but can be bought individually in case they are misplaced.
  • Third, a large eye needle for finishing the project. A plastic one comes with looms, but tapestry needles work great as well.
  • Fourth, yarn. Any color and just about any type that has a little stretch. Chenille is the only yarn I’ve found that absolutely won’t work on a loom. Plain yarn is best for beginners.
  • Fifth, directions. Loom sets come with basic instructions and there are all kinds of YouTube videos. The Purling Sprite weblog has a series of great tutorials.
  • Finally, a smidge of patience. It doesn’t take long to pick up the basics. Casting on, a basic stitch and casting off are all that are necessary for a basic hat. Later on stitch variations, multiple colors, and different yarn textures will exponentially expand hat potential.

Several years ago I went on a hand-crafted Christmas gift binge featuring all kinds of loomed hats.

OLYMPUS DIGITAL CAMERA

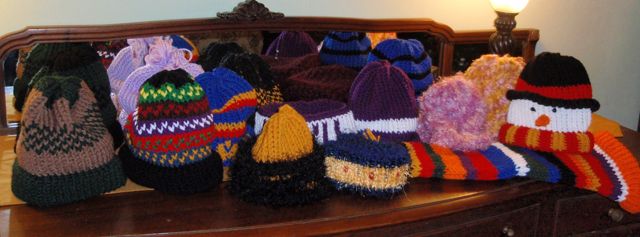
Many of my nieces and nephews were of college age, so I made hats in their school colors. Four of them – New York University, Kansas State, Winona State (MN) and Truman (MO) – were purple and white. Black and gold for Mizzou, maroon for Arizona State. One of my nephews was still deciding between six colleges, so I decided to make him a hat featuring all of their school colors. I learned that Bennington University does not have athletic teams or school colors, so I opted to represent it with black. Ben’s is the multicolor hat second from the left. (He ended up at the University of Oregon, green and yellow.)

Most of the adult men in my life requested a Fair Isle hat (far left) in a color combo of their choosing. Some of the ladies favored that pattern too, with a soft roll instead of a structured brim. I had a lot of fun with hats for younger kids. I found instructions for a snowman hat, bumblebee hat, and long toboggan hat and worked out patterns for a floppy beret and ear warmer bands.

Here are a few of my faves:

loomcollage
• Matt in a NYU ear warmer and Madison in her ASU weave top hat, Sara in her beaded KSU beanie and Julia in her Mizzou Fair Isle.
• Baby Bumblebee hat, Ethel in her floppy beret.
• Warm fuzzy hats, toboggan hat and snowman hat for the Minnesota cousins; John in a reversible camo/hunter orange stocking hat.

Looming is a hobby that can be done almost anywhere, anytime. I recently made another bumblebee hat during a car trip to visit the newborn son of a friend. Variations in yarns, brims and patterns make every project different.

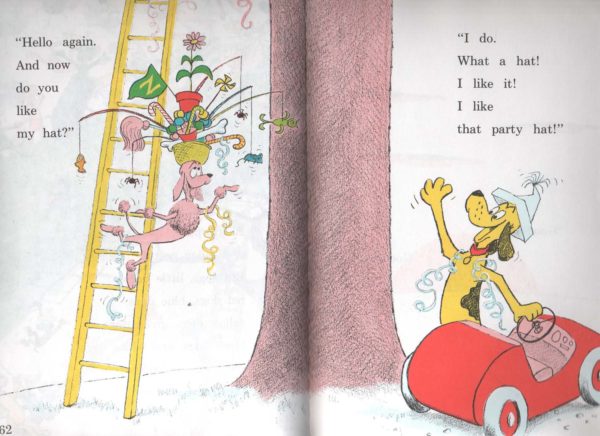
Now if you will excuse me, I am going to go figure out a pattern for one of these:

partyhat

Digital Photography 1: Boo-boos and Random Strangers

I have been hooked on digital photography ever since I bought my first 640×480 camera back in the day. It’s unbelievable to me how far digital photography has progressed since then, and how fast. My current camera is 18 megapixels and it’s quickly becoming antiquated.

When I think back to the film cameras of my youth, I remember having to keep in mind the cost of the film and processing, and having to limit my shots and hope for the best. Sure some turned out really well, but there were also a lot of closed-eye disappointments. Shots were also limited to documentation for the most part – pictures of vacations and milestone events.

Because of this, one of the things I appreciate most about digital photography is taking as many shots as I would like to capture the best image that I am able. Being able to preview shots is a huge benefit. Then I can pick out the best of the bunch and delete the rest.

Not all shots turn out well, but sometimes even mistakes turn out interesting.

OLYMPUS DIGITAL CAMERA
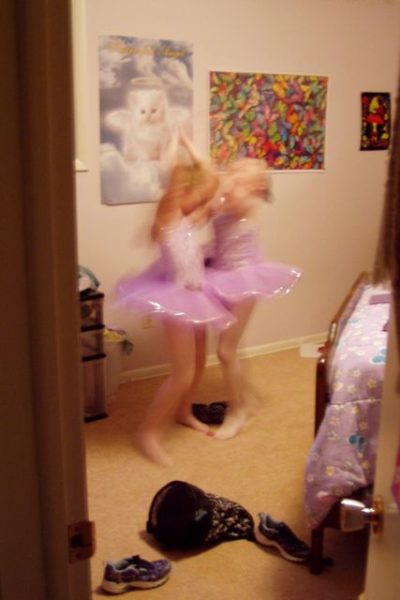
Laura and Alexis aren’t in focus, but I love the sense of movement as they get ready for a recital.

I didn't even know you could shoot a double exposure on a digital camera.
Boogers! Watch that shutter speed. Even though this makes me dizzy, it’s kinda fun.

As I have moved on from a point and shoot to a digital single-lens reflex camera, I have also been bitten by the bug to move beyond documentation into more artsy shots. I still have much to learn. I have lots of interests – landscapes, flowers, animals, travel, events, family and friends. I hope to post more about each of those subjects in future entries.

Generally I tend to stay fairly focused on the subject at hand, be it family members or a particular subject, but every once in a while I manage to capture a shot of a random stranger that I find fascinating, and will share a few of those here.

OLYMPUS DIGITAL CAMERA
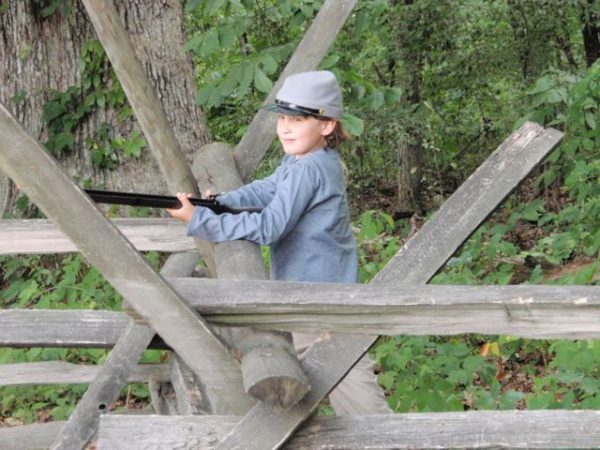
During a family vacation to Gettysburg in 2010, we decided to get up early one morning and hike through part of the the battlefield. On our way back, we encountered this lad in character. I like how he is framed by the rail fence.

vietnamboy
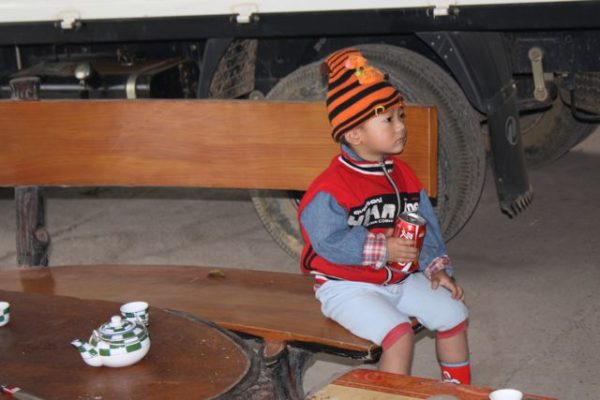
This adorable little boy was patiently waiting for his parents to finish their shopping at a roadside stop between Mai Chau and Hanoi when we visited Hanna in Vietnam in 2011.

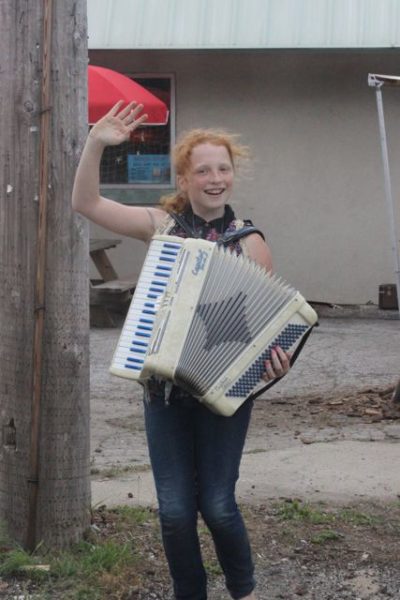
This was an absolutely lucky shot. This girl was playing the accordian and waving at cars passing by a general store in the Indiana Dunes in July 2013. I pointed the camera out the window, pressed the shutter and hoped for the best.
This was an absolutely lucky shot taken this July. This girl was playing the accordian and waving at cars passing by a general store in the Indiana Dunes. I pointed the camera in her general direction, pressed the shutter and hoped for the best.

The Artisan Side: Glass Jewelry

So far this weblog has introduced readers only to the wordsmith side of my character. Writing is definitely one of my favorite things to do, but I also enjoy making handmade gifts. Creating personalized glass jewelry pieces is one of my favorite artistic endeavors.

This hobby has its roots in a fundraiser for Laura’s eighth grade basketball team, the Trinity Lutheran Lady Tigers. The girls were having a great season and hoped to be invited to the Lutheran Basketball Association of America national tournament held at Valparaiso University.

One of the moms suggested personalized glass pendants. She had made them as gifts for another sports team, and they were relatively easy and inexpensive. We decided to make pendants for all of the teams coming in for the annual Trinity girls’ basketball tournament.

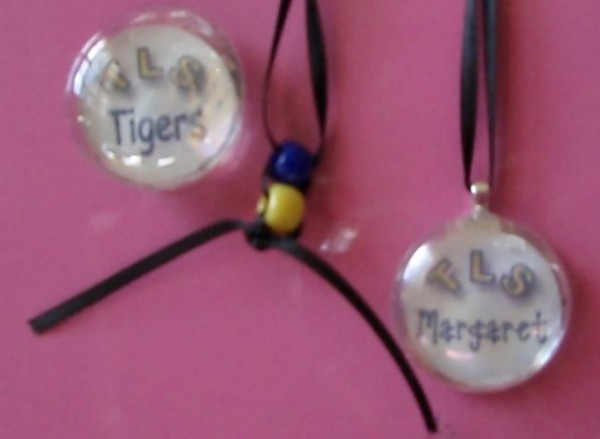
Somehow I ended up with the job of making images for the pendants. The athletic director gave me the rosters from participating teams and I came  up with a design that utilized the initials of the school and each player’s name. We had team parties to make the pendants and assemble the necklaces with ribbon and pony bead sliders in team colors.

OLYMPUS DIGITAL CAMERA
Pendants for players and magnets for coaches.

At a modest $5 price point, the pendants were a huge hit, especially among girls with unusually spelled names. We sold every necklace.

Many Trinity school parents were interested in buying additional pendants and magnets, so we took special orders. With a materials cost under a dollar per item this project turned out to be one of our best fundraisers. The girls went on to win their school tournament, placed second in the state tournament and played in the national tournament. Six of the nine girls went on to play high school ball.

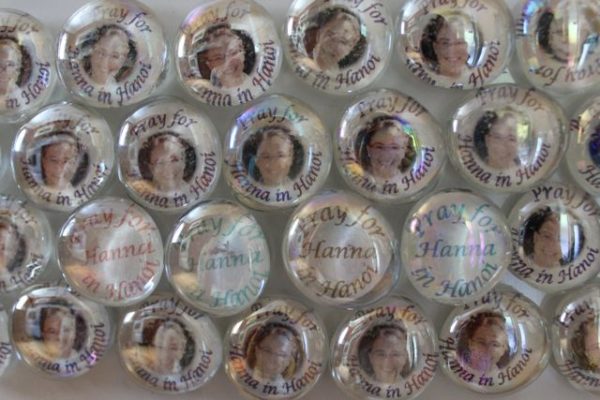
I liked the idea enough to use it again to make locker magnets for Laura to give as Christmas gifts to her teammates on the freshman basketball team. Later, when Hanna went on a mission trip to Vietnam, we made refrigerator magnets for her supporters.

prayforhanna
Pray for Hanna in Hanoi

By now, I had the hang of the technique, but wished to try something nicer than the bulk bag of craft glass pieces from Hobby Lobby. I discovered Sun and Moon Craft Kits, a wonderful online supplier of jewelry glass in various shapes, as well as bails (the metal piece glued to the back for the chain or ribbon to go through), metal trays that the glass fits into like a picture frame, ribbons and chains and materials of all kind. They also have great tutorials for jewelry projects.

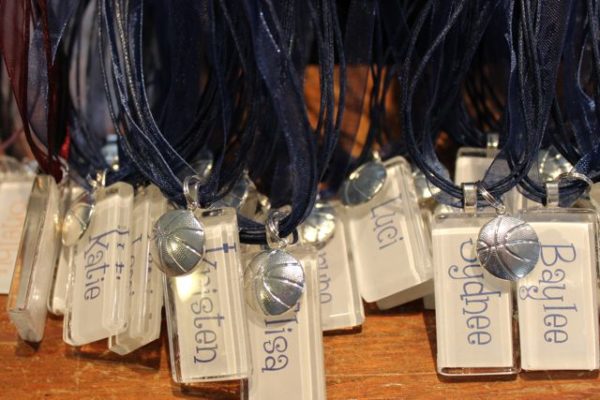
My first major project with new and improved supplies was making gifts for Laura’s basketball team last Christmas. This time I designed pendants using small rectangular glass, medium bails, navy blue organza ribbons, and  basketball charms.

bbpendants
Helias Lady Crusaders 2012-2013

Laura and I decided that her male coaches might not appreciate a pendant necklace and made bookmarks with basketball charms for them instead.

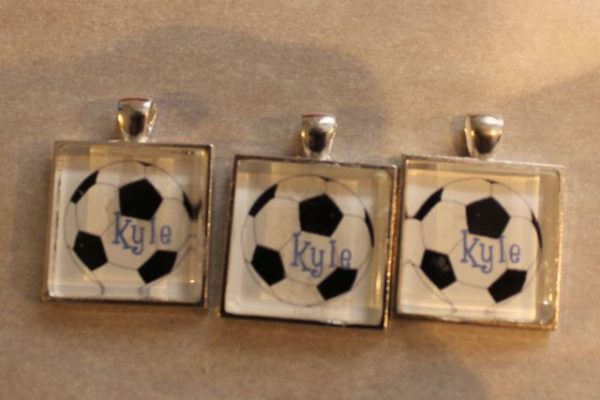
Kyle, Laura’s boyfriend, is goalie for the soccer team. She asked me to  design pendants for his mom and grandmothers.

kyle
These feature square pendant trays instead of bails.

Because glass jewelry is labor-intensive, I like to work in batches to minimize waste of materials and maximize use of my time.

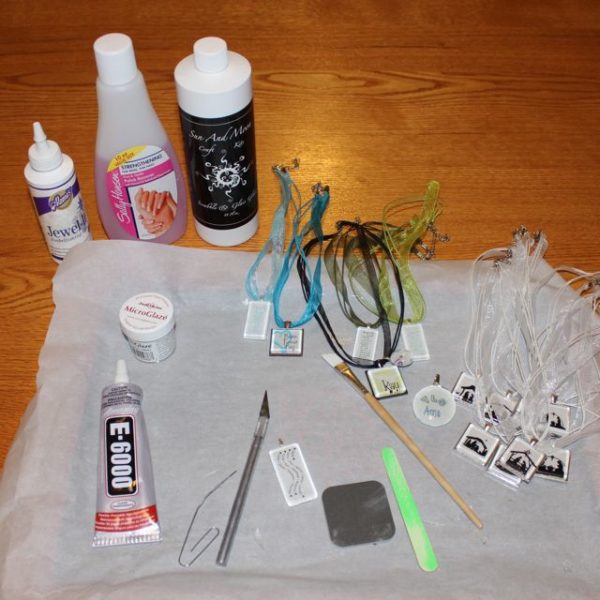
tools
My preferred supplies:
• Card stock run through a color laser printer
• Jewel-It or Sun and Moon Glaze
• E-6000 glue for attaching to the bail or tray
• nail polish remover
• x-acto knife, paintbrush (or cotton swabs), emery boards

My latest batch included pendants for friends I visited in Houston and Little Rock this summer.

vacationgifts
Incorporating unusual spelling, favorite colors and individual interests make a truly personal gift.

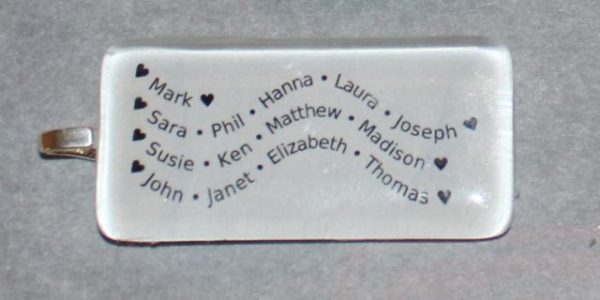
For my mom’s milestone birthday this month, I designed a pendant using a wavy text generator and the names of all her children, their spouses, and the grandkids.

mombday
Happy 55th anniversary of your 25th birthday, Mom!

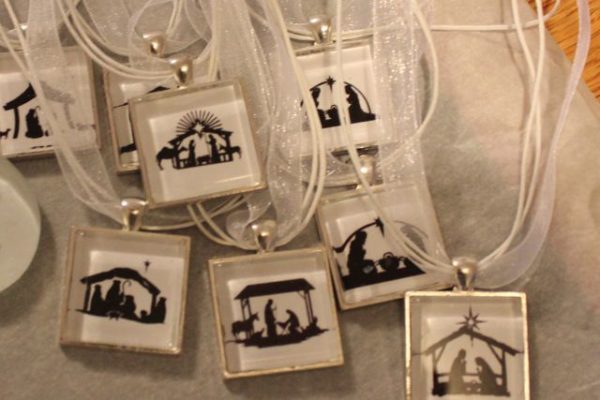
In December my mom and a couple of her friends host an Advent by Candlelight table. I offered to make nativity pendants for her to present to her guests this year.

advent
Eight different Nativity silhouettes in square pendant trays with white organza ribbons are simple yet meaningful party favors.

I’ve got plenty of supplies on hand and lots of ideas for new glass jewelry, so who knows what I may come up with next. Maybe my own Etsy shop.